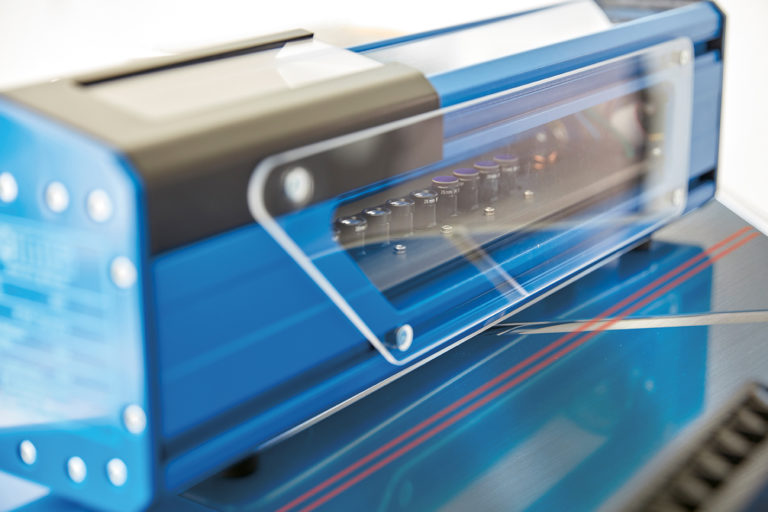
Multiple high-tech cameras connected in series (camera cluster systems) guarantee highest measuring accuracy for maximum quality requirements
Heiligenhaus, August 2022

- Unique camera cluster systems enable precise flatness measurement even on high-gloss materials
- High sampling rate thanks to embedded FPGA image processing
- Measurement insensitive to vertical shift and vibration
- Interface to control systems
- Online visualisation of results and reporting via customised results interface
The demands on the surface quality of rolled strips, sheets and plates are growing steadily. Today’s processing industries require starting materials with flawless, flat surfaces. Accordingly, flatness and evenness, along with other criteria such as strip thickness, have become one of the most important quality characteristics for end products from process lines and service centres.
Manual inspection of flatness is no longer sufficient to guarantee the surface qualities required. Complete documentation of concrete measurement results as proof of quality is also simply impossible with this procedure.
Fully automated measurement, control and documentation of flatness and evenness is therefore a decisive success factor that not only significantly increases the quality of strips, sheets and plates, but also reduces critical factors for output such as the scrapping of defectively manufactured products.
Optical Flatness/Evenness Measurement of High-Gloss Material
Non-contact, non-destructive testing of flatness/evenness is carried out using optical measuring methods. High-performance cameras that detect and document the topography of the material are used for this. In most cases, individual cameras that detect the strip across its entire width are used.
To enable these cameras to recognise the surface quality of the rolled products and to evaluate unflatness as height differences, straight laser lines, which deform in the case of unflatness, are projected on to the material. The cameras detect these deformations, which are converted into exact measured values by downstream software, and thus document the concrete surface profile of the material.
In the case of very shiny surfaces, as is the case with aluminium, for example, these laser lines are scattered at different angles by the reflection of the material and are not recorded with the same intensity throughout.
If the camera is positioned approximately vertically above these areas, the cameras do not experience such scatter loss. Towards the edges of the strip, however, which also act as the limits of the camera angle, there are undesirable measurement inaccuracies.
The CCS flatness/evenness measuring system of the world’s leading manufacturer IMS Messsysteme GmbH is based on a measuring technique that is unique on the market, in which a large number of individual cameras are connected in series to form clusters.
The distance between the cameras is 20 mm. To detect the flatness of a strip 2 m wide, 100 of these high-tech cameras are used, each of which detects only a narrow area of the strip width and is thus positioned almost vertically above the material, thereby avoiding measurement inaccuracies due to scatter losses. In other words, a technical measuring principle which, due to its design, guarantees exact flatness and evenness measurement even on high-gloss materials such as aluminium.

Technical Advantages of CCS Flatness / Evenness Measurement
As a further technical finesse, the exposure time of each individual camera can be adjusted individually. The laser lines projected on to the material are thus perfectly captured across the entire width of the material and the measurement results obtained are highly precise as a result.
The evaluation of the flatness measurement can be customised in both longitudinal and transverse directions, and the design of the camera cluster systems can also be customised. Due to its compact and modular design, the vibration-compensated CCS flatness/evenness measuring system can be optimised individually for any strip or plate width.
The measurement results are archived in a long-term data storage system and are made available to quality engineers in production resolution and to product developers in high resolution.
Further, thanks to fully automated standardisation with a DAkks-certified calibration standard, the capability of the measuring equipment is guaranteed permanently.
A CCS flatness/evenness measuring system can not only be combined with other IMS measuring systems, but can also be easily integrated into plant automation thanks to its customer-specific design.


